Zoom Technical Setup Guide
The first step is determining what kind of device you'll be connecting with. Zoom works with iPhone, iPad, Android Phones, Tablets, and more as well as PC, MAC laptops and desktops.
***Please note that we are unable to support users joined via the Zoom web client, Smart TV web OS, and Chromebooks/Chrome OS products as they are unable to fully utilize the Zoom virtual breakout room technology powering our studios.***
iOS and Android Phones and Tablets:
- From your iOS or Android device
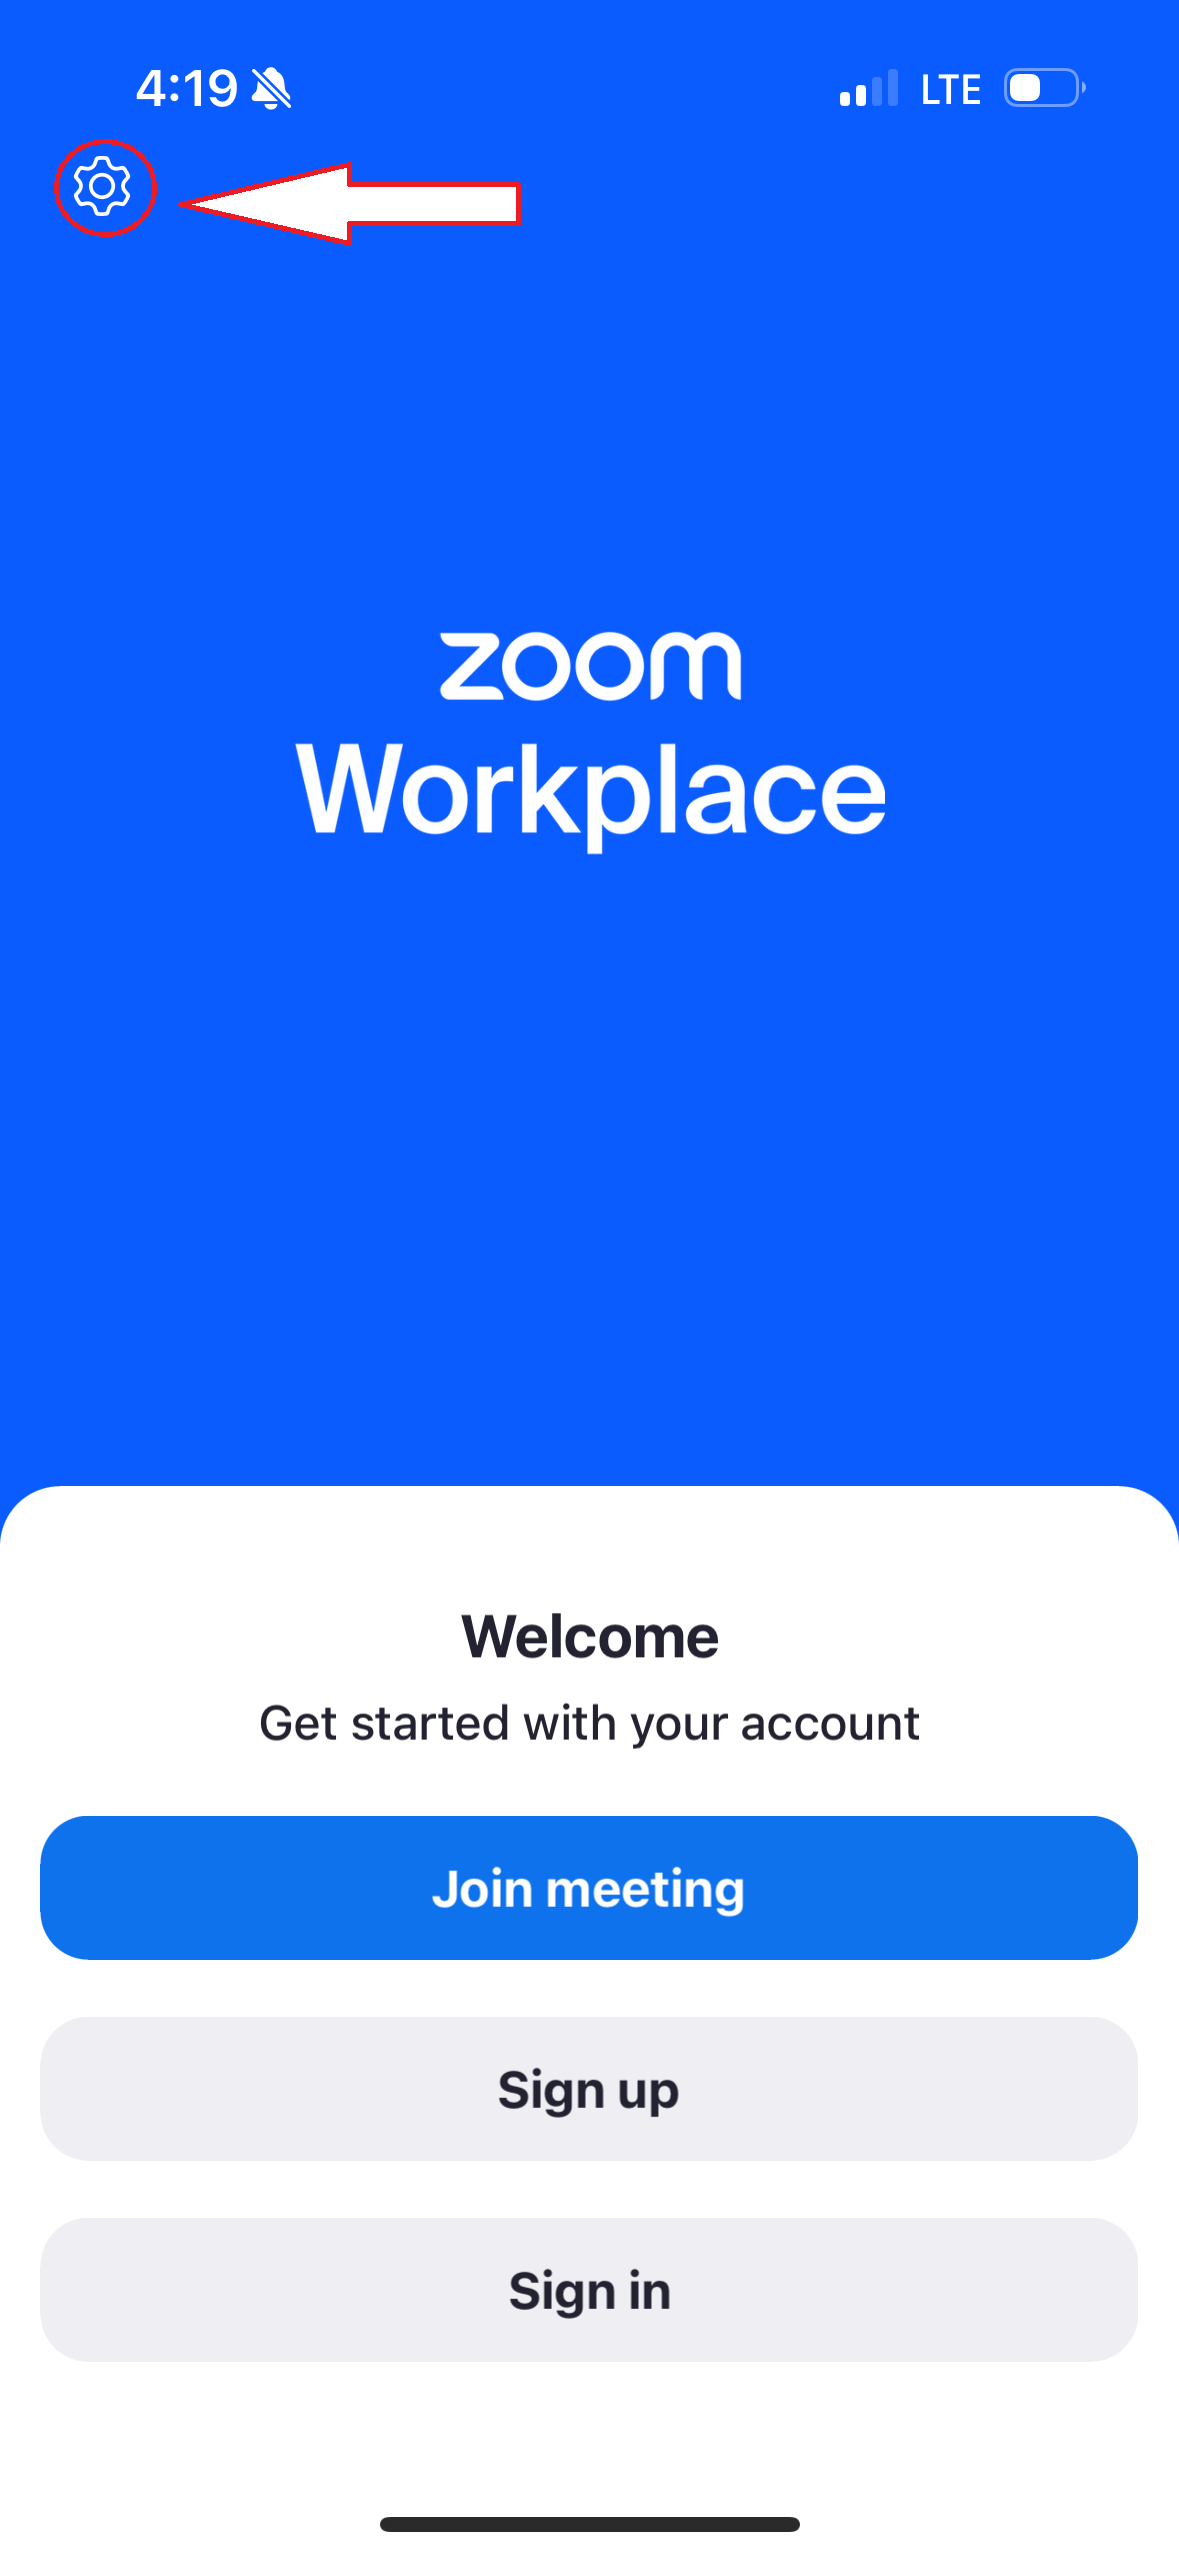
- Tap the Settings Cogwheel
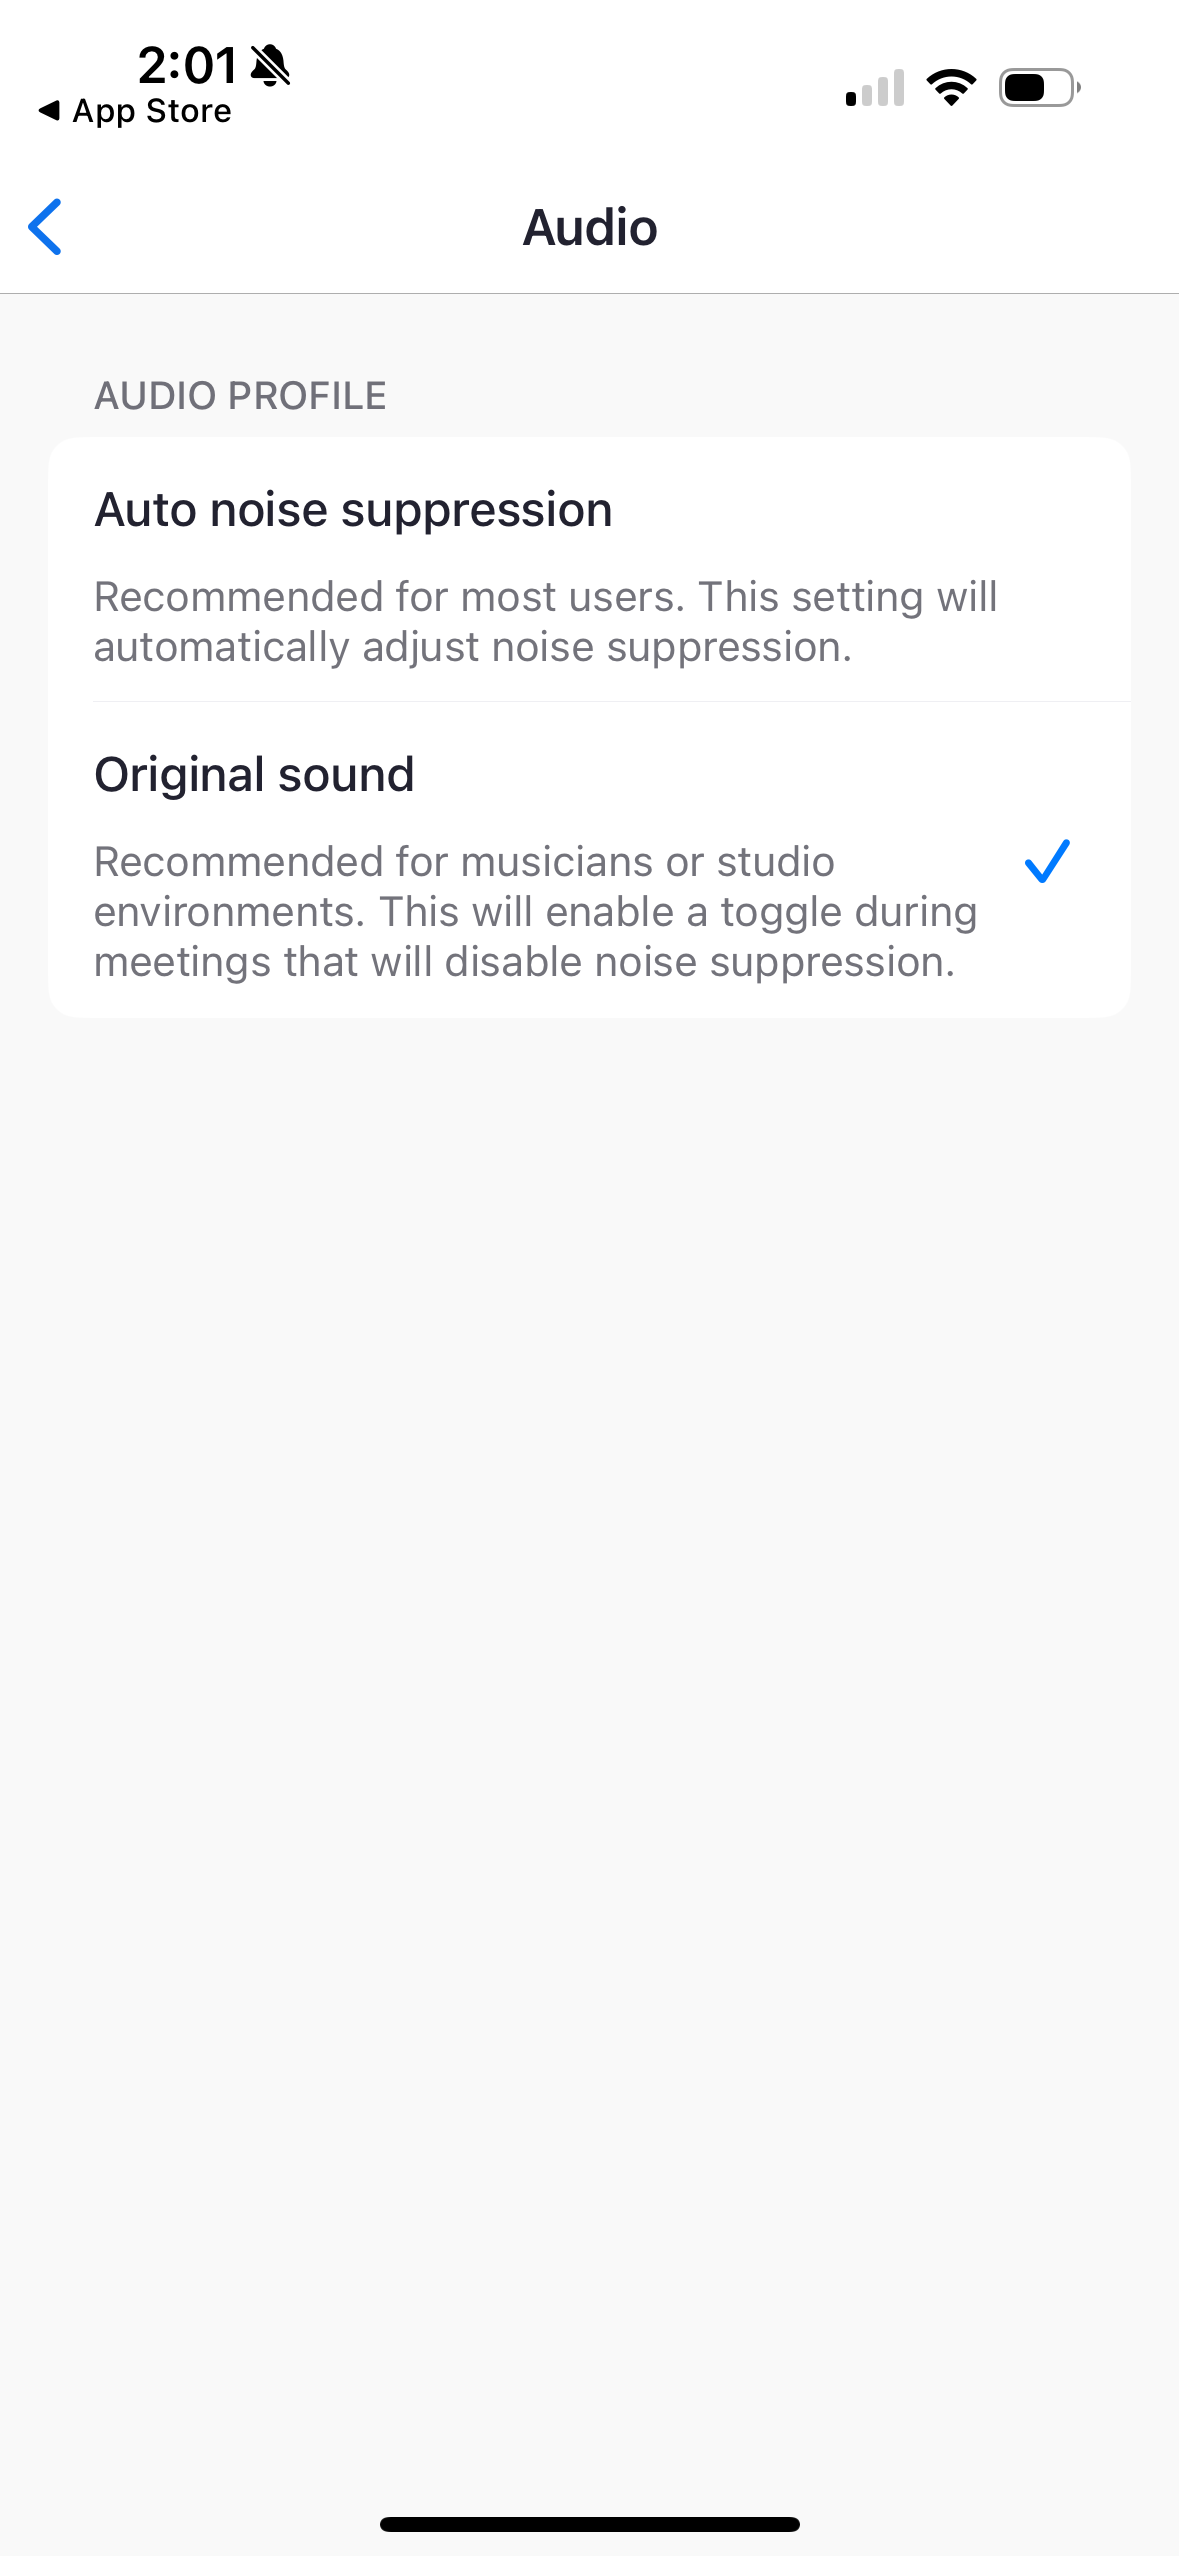
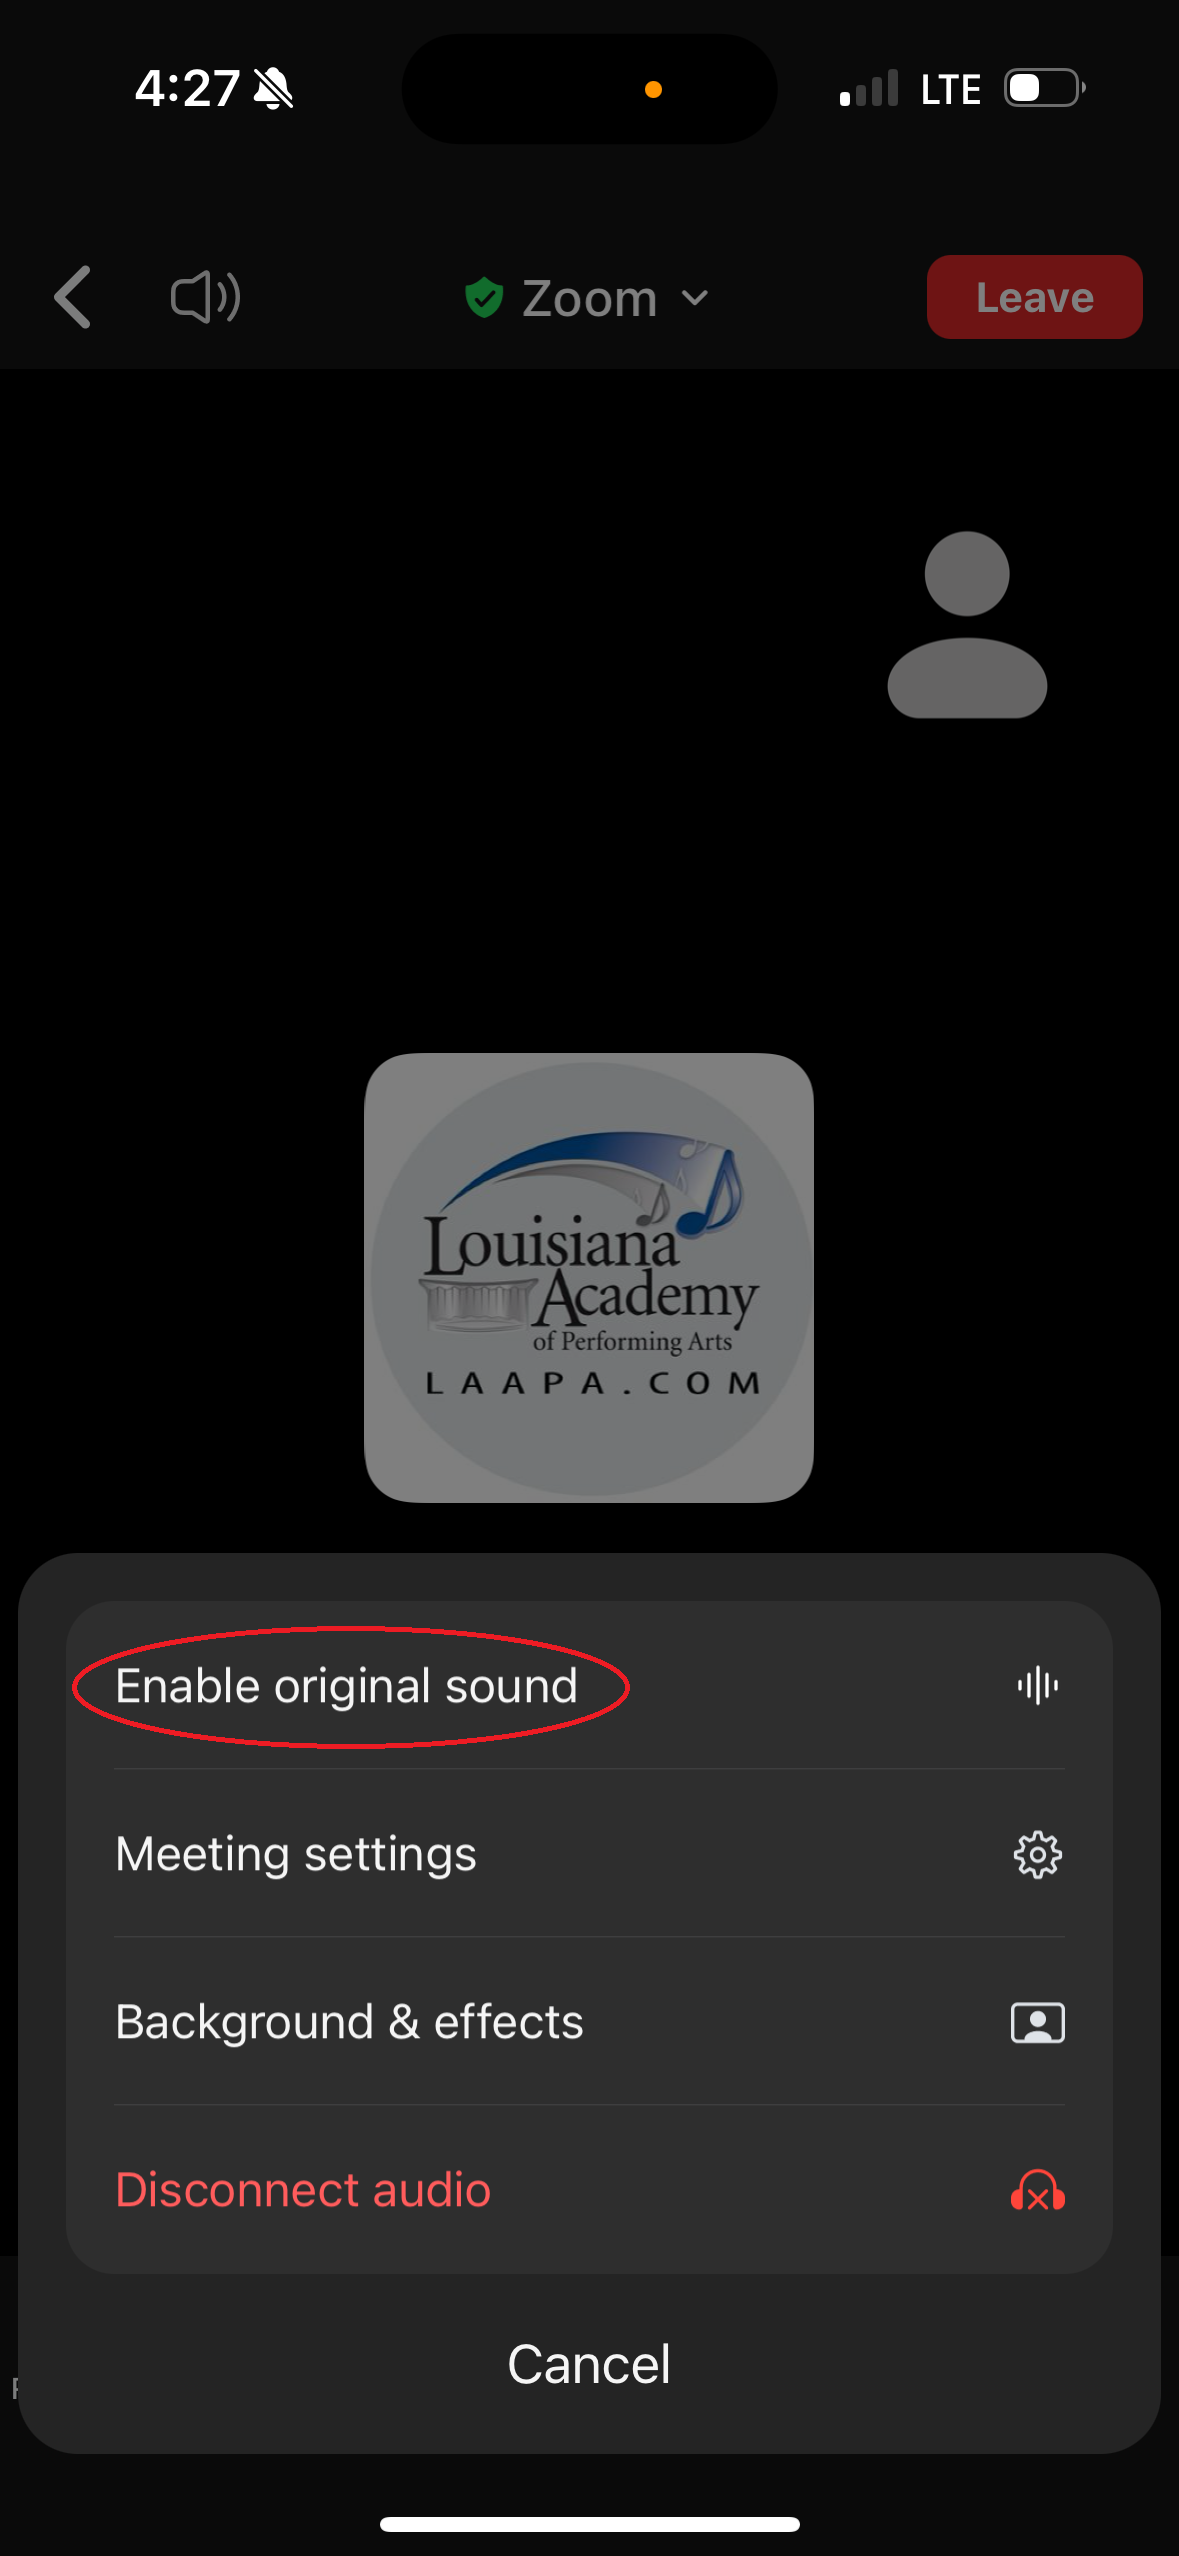
- Scroll down and toggle the setting for "Use Original Sound". This will optimize your audio quality.
- Enter the Meeting ID 504-208-2301, and enter student full Name and Instrument or Program studied ie. Bill Evans- piano.
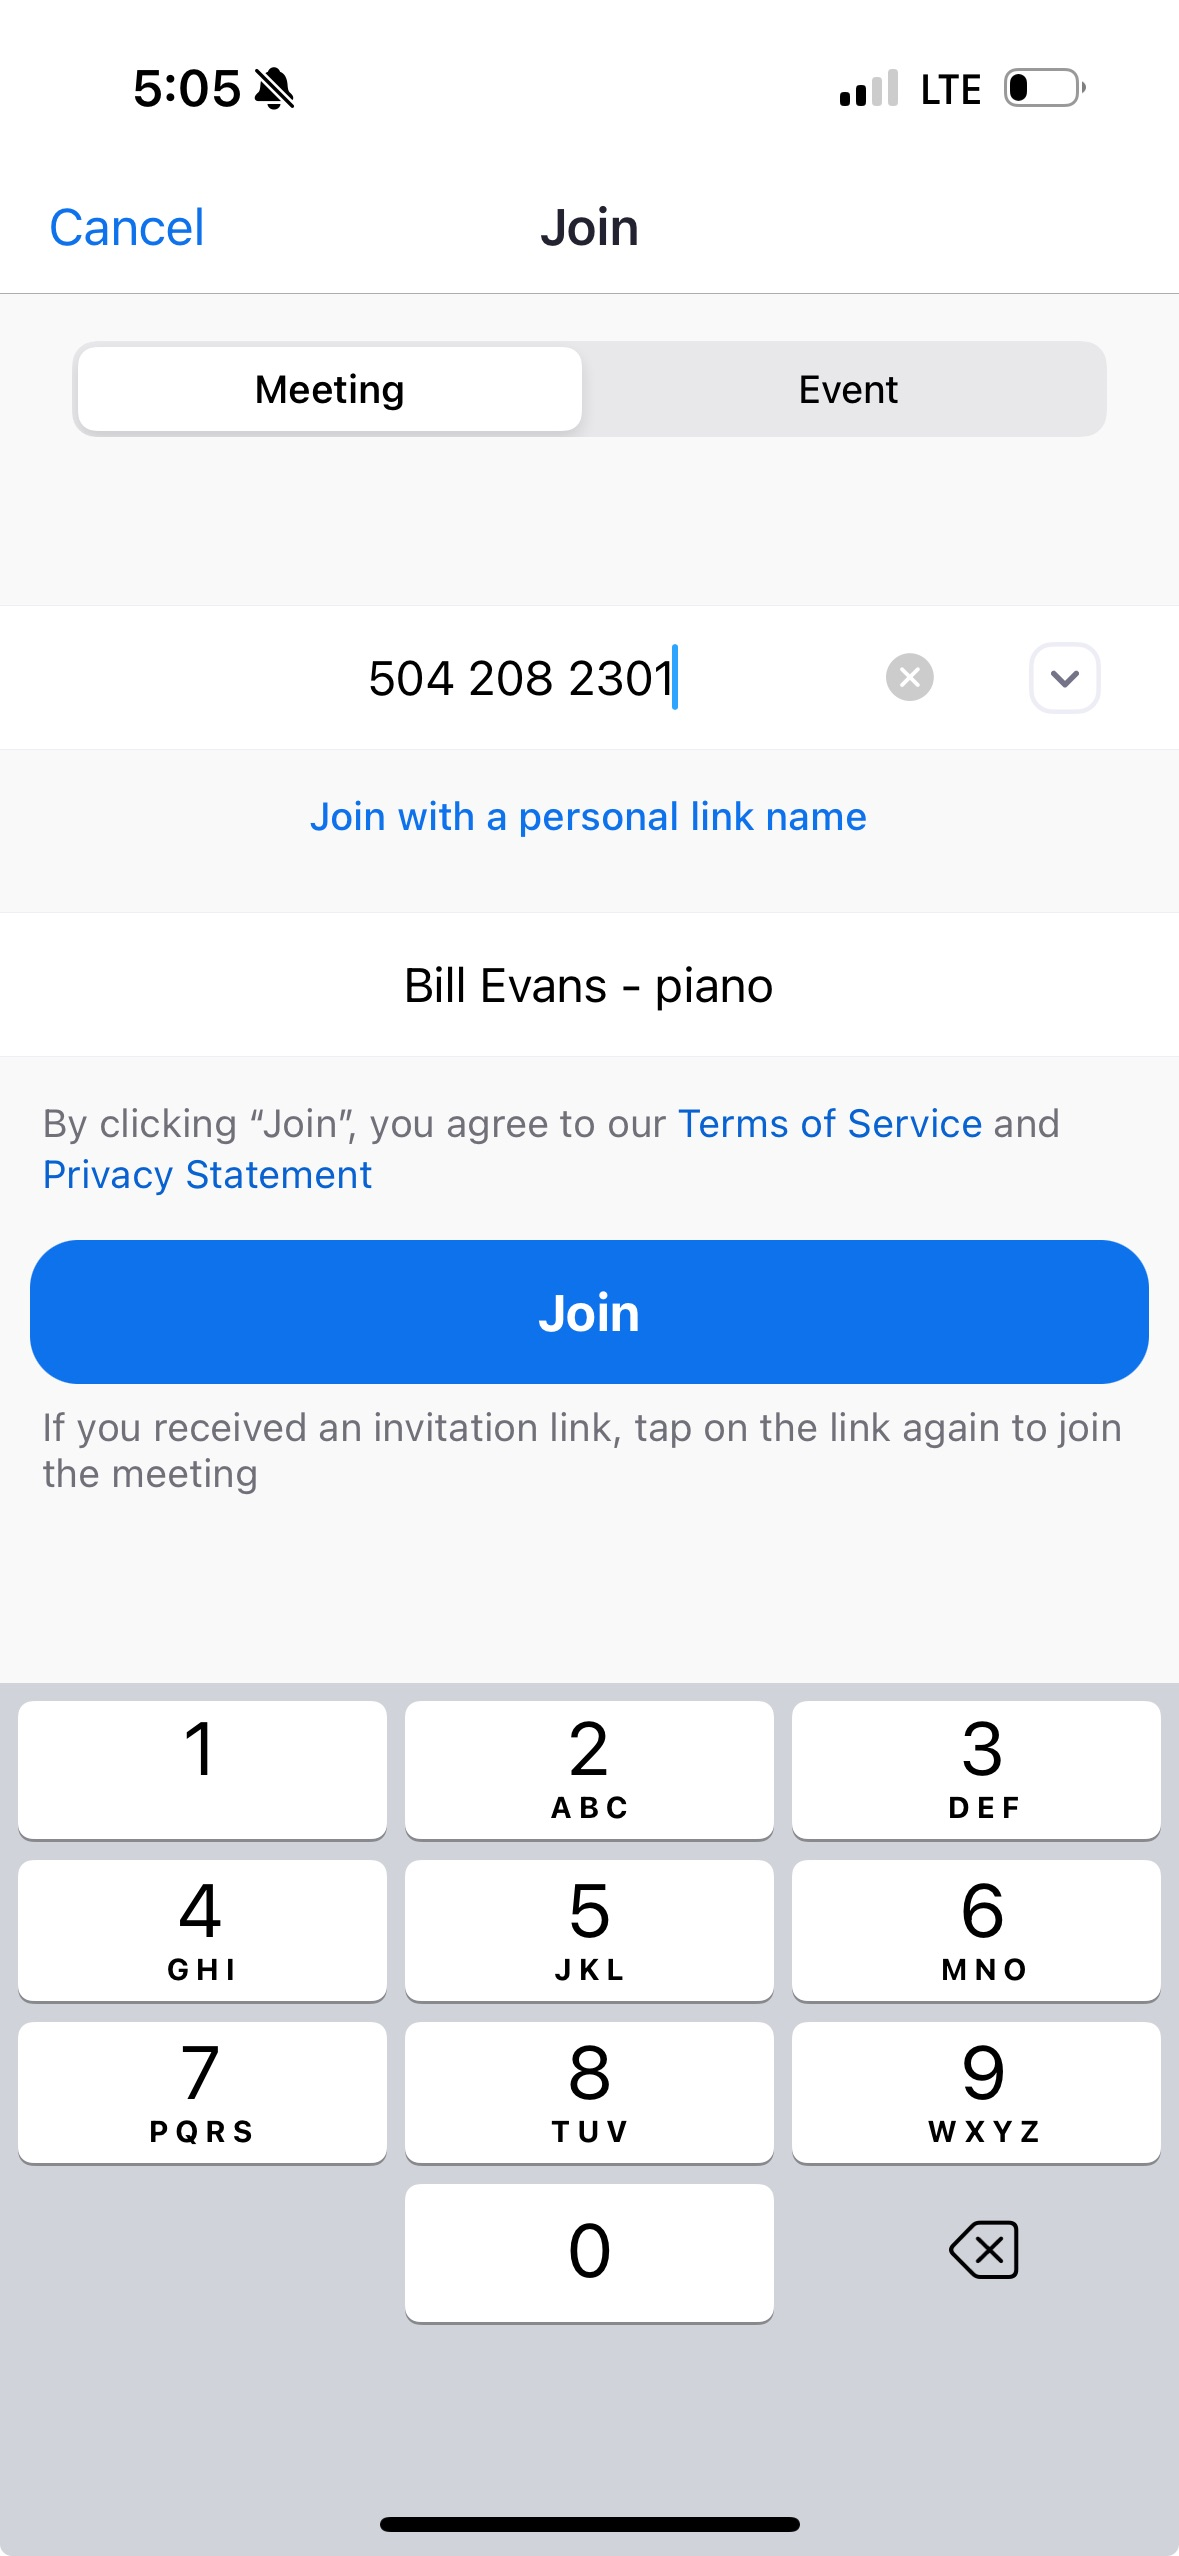
- Click the Join button to enter the call. You will be placed in our Virtual Lobby until your teacher is ready for your lesson. If for some reason you are waiting and no one lets you in by your lesson time, please call for assistance!
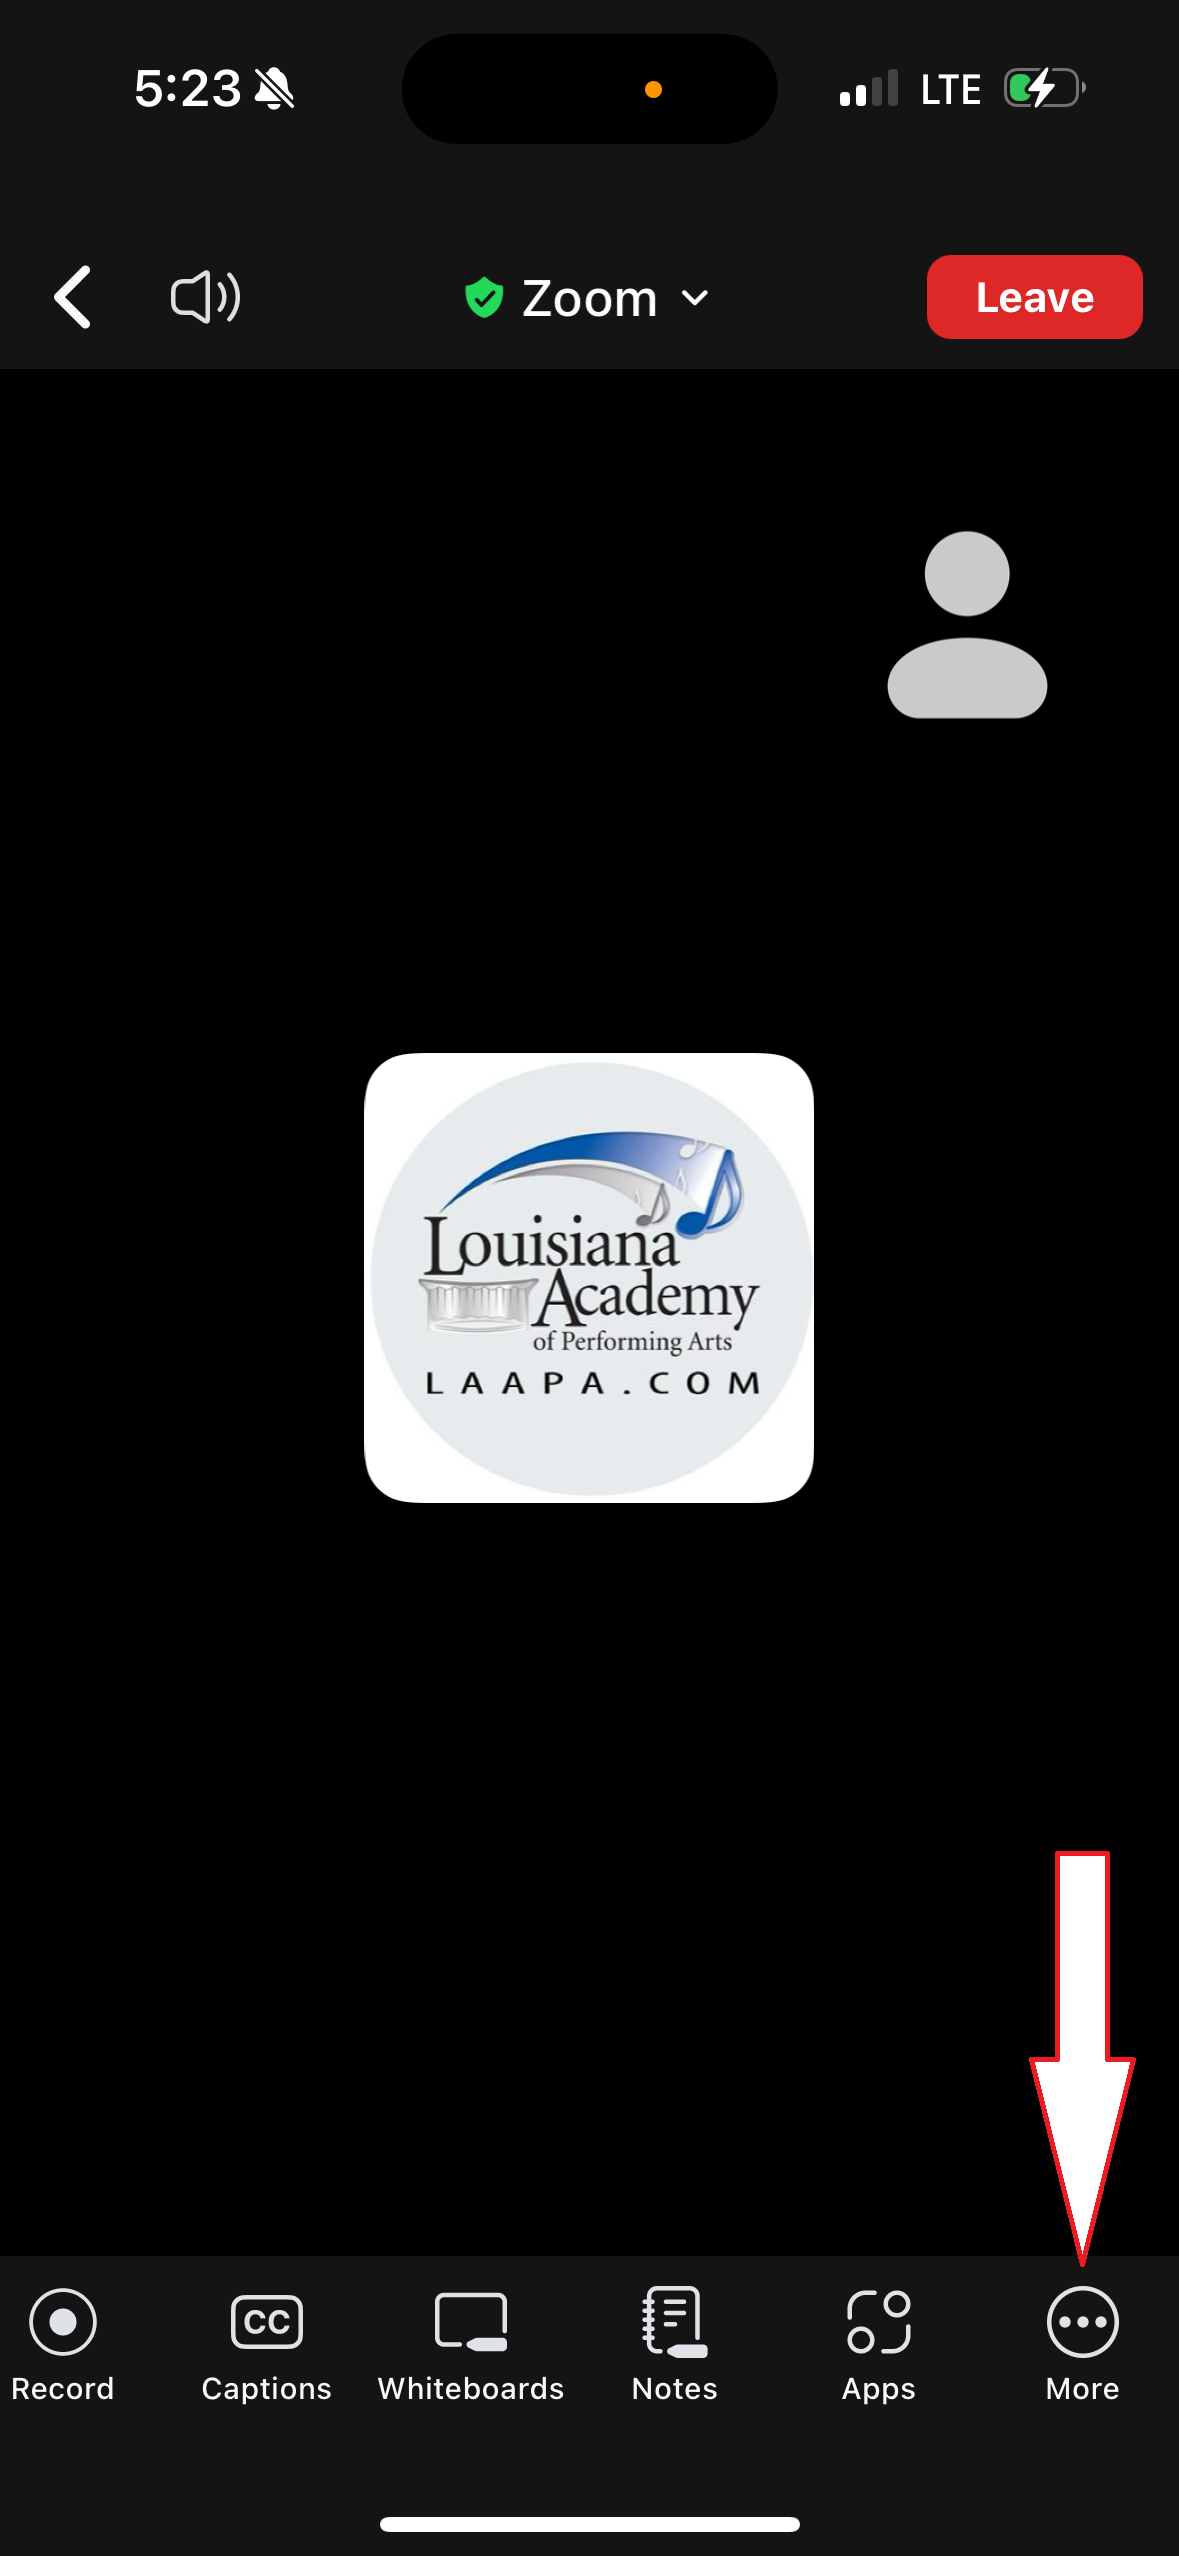
- Once you are admitted into the call, you need to enable "Original Sound" for the call. Don't ask us why you have to do this again! Swipe the toolbar at the bottom to the left to find the More button with 3 dots.
iOS/Android Additional Notes:
Once you are admitted into the lobby - you will select which Audio you'd like to use. Most people will select the first option "Call Using Internet Audio". If you'd prefer to dial into the call with a second phone, tap the "More" button and disconnect audio and then join again by selecting the "dial in" option.
Try to set the camera at the best angle to capture yourself and your instrument or program. You'll likely need something to prop your device up against - anything you have around will likely do, but if you'd like to look for something handier, click here for some ideas
If you'll be dancing online, try to find the largest space in your house so that you have enough room to freely move around! A hard surface is also best when available.
If you'll be taking a music lesson, try to find a quiet space free from home distractions like TV, siblings having sword fights in the background, etc :)
Ensure that your video and audio are on by tapping the middle of the screen and then you should see controls appear in the app. You can find the "Mute"
and "Start/Stop Video" Button in the botton left corner of your device screen. Ensure that they are NOT RED with a slash through them. A red color and slash means they are not enabled.
When your teacher is ready for your lesson to start, the Front Desk will virtually escort you into your studio. Be sure to click the"Join" option once you see a white button pop up on your screen!
After your lesson is over - you may visit the front desk in the Virtual Lobby again by selecting the LEAVE button in the top right corner of your device and selecting "Main Session" OR simply choose to end the call until next week.
Remember that your teacher may upload additional content for you in your MyMusicStaff.com Account, so don't forget to login there!
Enjoy your lesson!
PC/MAC Laptops and Desktops:
- Open your Internet browser such as Safari, Google Chrome, Internet Explorer or Microsoft Edge, etc.
- Navigate to https://zoom.us and open the "Resources" menu.
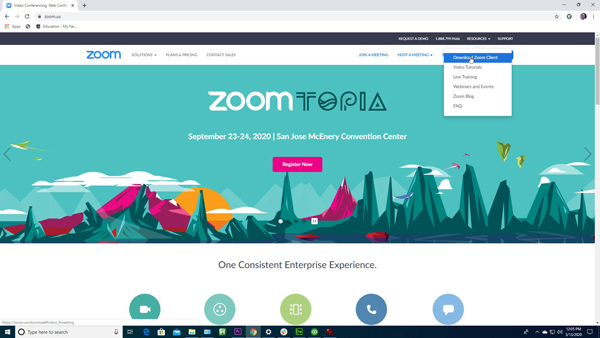
- Click "Download Zoom Client"
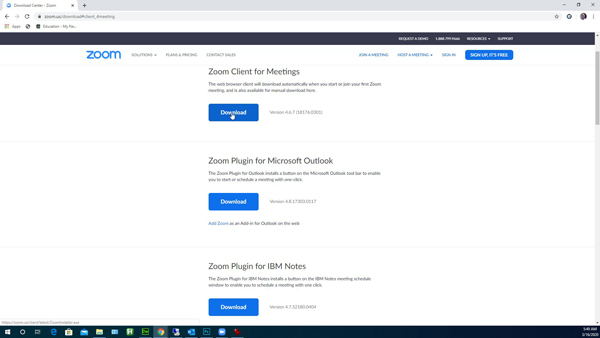
- This will bring you to all of the Zoom downloads. You need the first option which is the "Zoom Client for Meetings".
- Click the large Blue Button to download and Install the Zoom Cloud Meetings application.
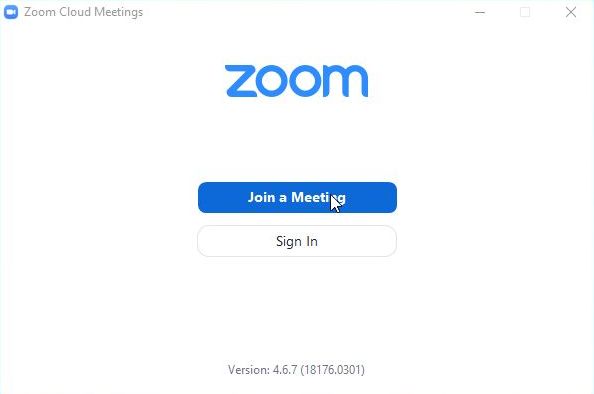
- Once everything is installed, launch the application (the icon should be a camera with a blue background).
- Click the "Join Meeting Button"
- Enter the Meeting ID 504-208-2301, and enter student full Name, and Instrument or Program studied ie. Joe Johnson, piano.
- Click the "Join" button.
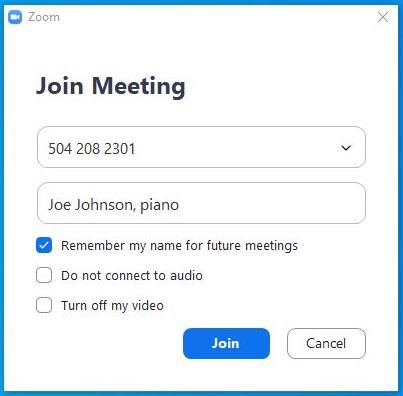
- You will then be placed in our Virtual Lobby until it's time for your lesson. A staff member will greet you and setup your lesson with your regular teacher! It's that Easy!
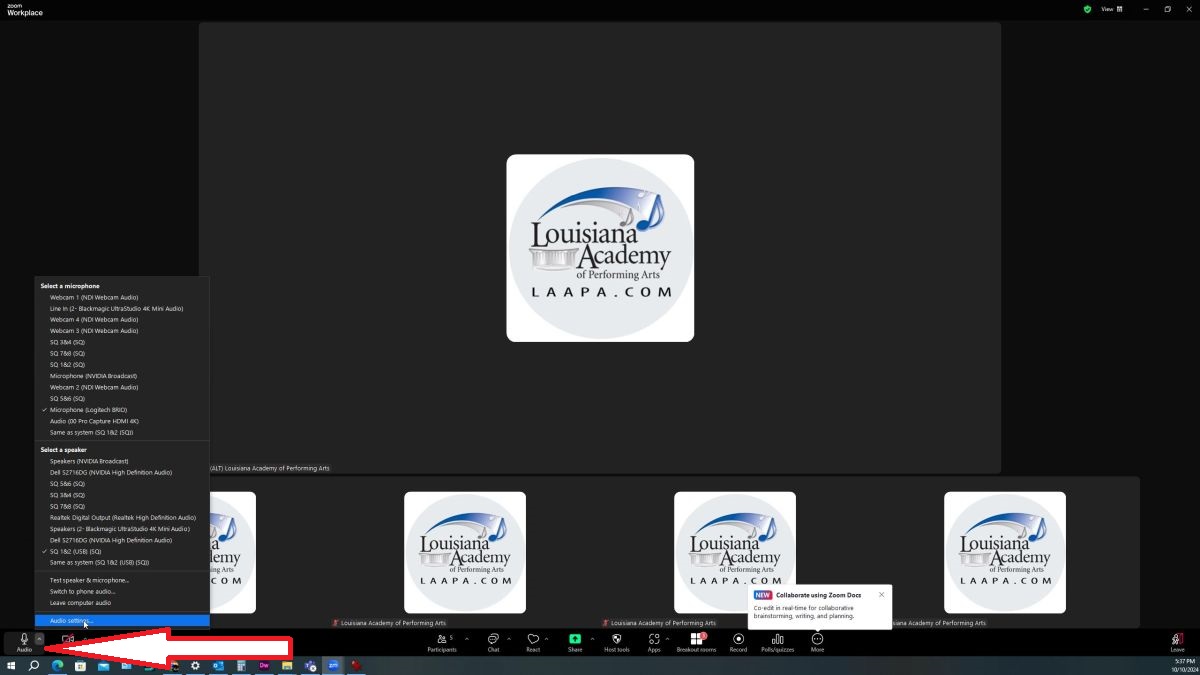
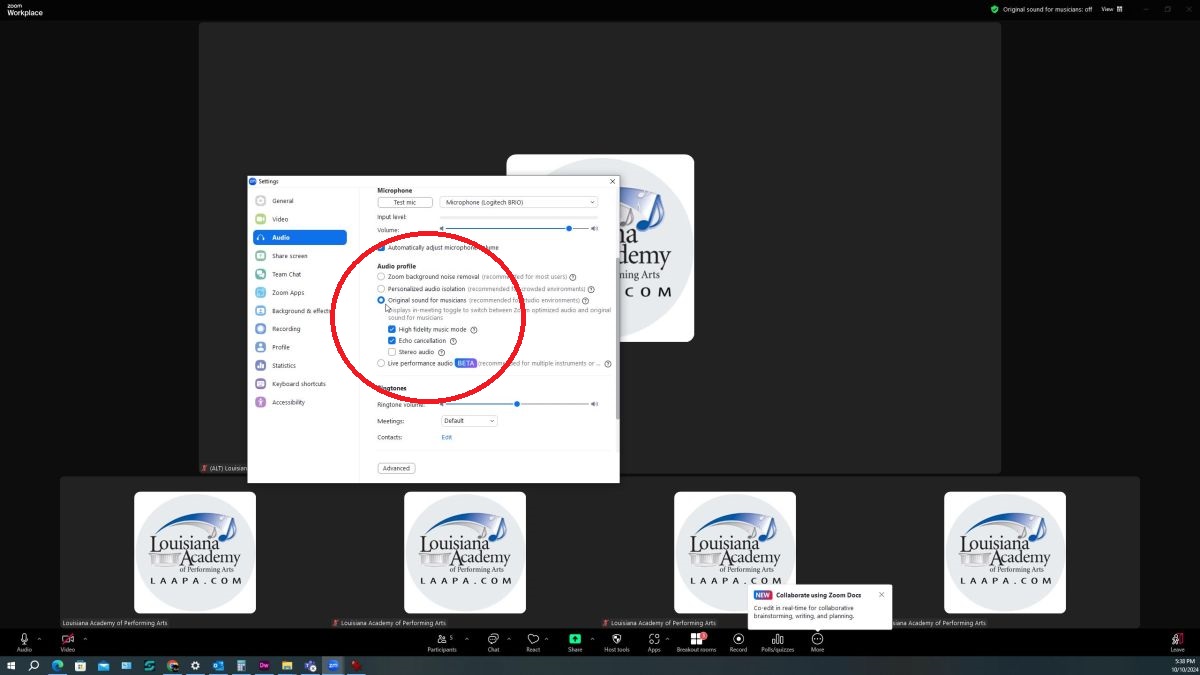
- Once you are admitted, please goto the Audio Settings on the bottom left and enable "Original Sound for Musicians"
PC/MAC Additional Notes:
Once you are admitted into the lobby - you will select which Audio you'd like to use. If your microphone is built into your camera, your computer should automatically start it, however, if you have several mics or audio input devices, you may need to select the correct one.
If it's your first lesson, the staff at the front desk will take a moment to ensure your audio and video are working correctly.
If you'll be taking an online dance class, try to find the largest space in your house so that you have enough room to freely move around! A hard surface is also best when available.
If you'll be taking an online music lesson, try to find a quiet space free from home distractions like TV, siblings having sword fights in the background, etc :)
In most cases your audio should automatically start, in some cases, however, you may need to choose your preferred microphone. To choose your microphone, click the "UP ARROW" next to the Join Audio or Audio button in the bottom left corner of the application. There you should see your webcam as an option or the option to Dial In using "Phone Audio". Selecting Phone audio will give you a phone number to dial in should that be easier for you to use!
When your teacher is ready for your lesson to start, the frontdesk will virtually escort you into your studio. Be sure to click the"Join" option once you see a white button pop up on your screen!
After your lesson is over - you may visit the front desk in the Virtual Lobby again by selecting the LEAVE button in the top right corner of your device and selecting "Main Session" OR simply choose to end the call until next week.
Enjoy your lesson!
If you are having trouble hearing others OR they are having trouble hearing you. Check the bottom left corner of your screen and ensure that mute is not enabled. You may also need to "join audio" and choose either computer or dial in audio options.
If you are still having issues, try using the Zoom app instead on a mobile device. If this corrects the issue, then you need to further debug your PC/MAC.


